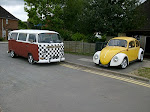
I am French living in UK since 1998. I bought my 1960 Kombi in August 2007. In France, I also have a 1961 Kombi, a 1974 Beetle and a 1976 German Army 181 Trekker.
Today I have made some brackets to hold the beams in place. And then i have placed the 2nd sheet of hard board. The cupboard at the back is finished and ready to be painted. I am gonna leave it to dry for a week.
At the back there is no way of holding the beams to fix the ceiling. I had to build a unit. The beams will slot to the front of the unit . I am now ready to stick more insulating foam behind the back beam.
I haven't got any lining on the roof and last time i slept in the van, I had a lot of condensation. So this weekend i decided to do something about it. I had to find a way of attaching some 3mm sheets of hardboard on the ceiling. I have cut one length of 25mmx30mm wood and squeezed it between the arches. I then stuck some insulation to keep the van warm.
All the beams are now in place and the ceiling can be placed.
The beams allow me to nail the sheet of hardboard in place and keep the shape of the roof.
The back of the van hasn't got any arches. I had to build a shelf. it will be very useful to have as a cupboard and it will also keep the beam in place. I will give it go tomorrow.
Tonight I went to my DIY shop to have a look round and I found this wallpaper.... Could I do someting with it? May be I could... Hum hum... I need to think about it. What am I gonna do with that?
Today i have started to build a compartment under the rock'n roll bed. I will install two 6"x 9" Speakers and the Amplifier.
The piece of MDF is ready to be cut. This is where the compartment will be.
With the seat down, everything will be hidden. The hole for the first speaker. Both holes are now done. I also had to cut the left side of the board to fit the shape of the van for a perfect fit.
The dashboard is immaculate so I don’t want to do any modification that could ruin it. I decided to use my 3G Nano ipod as a head unit. The modification consists of drilling some holes in order to fit an ipod cradle into a spare ashtray. You never know, I might want to fit the original one back. The ipod would not be able to deliver enough power on its own so I had to use an amplifier to feed the speakers. I have modified the cradle in order to allow me to switch the amplifier on/off. The IR LED is now visible through the grill of the dashboard to give a better range for the remote control. Lots of Dremel work
Cradle modified to add swich and take IR out of unit
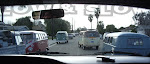
Today I went to town and I had to stop at the magazine shop to have my weekly read of all the VW magazines available. What a surprise when I opened the new issue of Volksworld..... This month featured an article about the Ace Cafe and I couldn't believe my eyes. There was my Kombi! It's the first time my van has been in a magazine. That's cool.....
A lot of parts are sold on an exchange basis at T2D. This allows them to modify the parts in order to sell them with their narrowed setup. Searching for interesting parts for my front beam I have managed to find these Split Screen Arms & Leaves on the internet. The axle supporting the shocks will have to be shortened on the upper Arms while the Leaves will have to be narrowed by 2" in each side in order to fit on the 4" Narrowed beam.